What if you don’t have a DVD writer or CD writer to format your Windows which is installed on yourPC and suddenly if it gets affected with virus? What do you do? Buying a DVD writer would be the only option to you but let me tell you that to recognize a particular Dvd writer older versions ofmotherboard requires the drivers to be installed. The only resort to you is boot from a USB Flash drive and the process of making a Flash Drive bootable is listed below.
What you need?
To start with you should have a pen drive with minimum of 4 GB and more for Windows 7 and 2 GB for Windows XP if you want to make a bootable USB Flash Drive. Other requirements includes installed Windows 7 or XP or XP Service Pack 2 DVD (CD of XP/ SP2 also acceptable) and if you don’t have such disk then you should create one. There are also limitations on which a particular flash drive will work or not, the prime factors are flash drive maximum capacity and speed of copying. Speed of copying isn’t a big factor but formatting would be very slow if copying speed is slow and keeping all those in mind USB 2.0 would be perfectly preferred. So total a Windows XPbootable CD, USB Pen Drive of atleast 4GB will do it.
Procedure
1. Format your Flash Drive
The first step towards creating a bootable Flash Drive is formatting your Pen Drive. by default the windows, Windows 7 will format you Pen Drive in FAT format but ensure that it been formatted in FAT file system.
Once the Pen drive formatting is over move to next step.
2. Download WinToFlash free]. Once the download is complete you need to install the program and run it. The software is of size 6.7 MB and doesn’t take 2 mins to download it.
3. As soon as you launch the program installed, you would get the following screen.
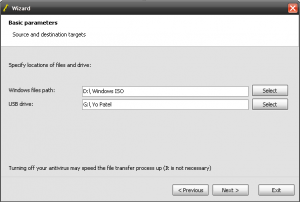
4. Now enter the windows file path where the ISO of windows lies and in the next tab provide the USBdrive address.
5. Click on Next will take you to further 1 step to complete the procedure.


No comments:
Post a Comment